Managing Your Workspace Users
As a workspace administrator, you can control who has access to your Kutano workspace and manage their account details. This page shows you how to add new users, update their information, and adjust their access privileges.
How to Access User Management
- Open the Sidebar menu
- Click on Workspace Admin
- Select Users
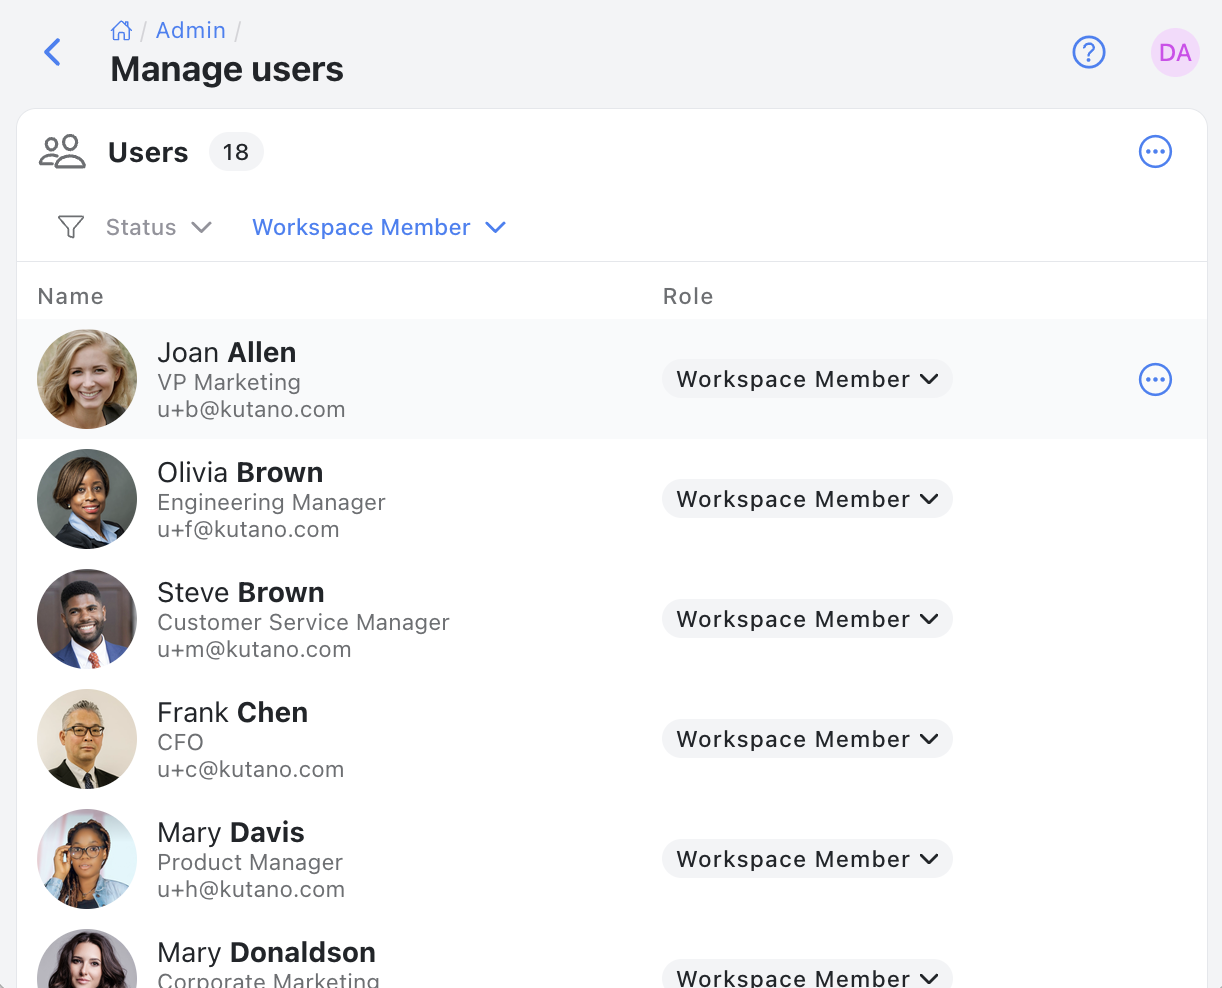
You'll see the user management screen:

Finding Specific Users
The search and filter tools at the top of the page help you locate users quickly:
- Search box: Type a name or email to find specific users
- Status filter: View active users, inactive users, or both
- Role filter: Filter by user roles (e.g., admin, regular user)
These tools are especially helpful when you have many users in your workspace.
Managing Individual Users
Each user has a menu of actions you can take. To access these options:
-
Find the user in your list
-
Click the three-dot menu icon next to their name

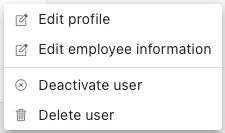
You can:
- Edit profile: Update their name, photo, or contact information
- Edit employee information: Change job title, department, or location
- Deactivate user: Remove a user's access while preserving their data (useful when someone leaves your organization)
- Delete user: Permanently remove the user and their personal information from the workspace, while preserving any content they created. This option is important for complying with GDPR and other privacy regulations that give users the right to have their personal data erased upon request.
Adding New Users to Your Workspace
To invite team members to join your workspace:
- Click the Add users button at the top of the page
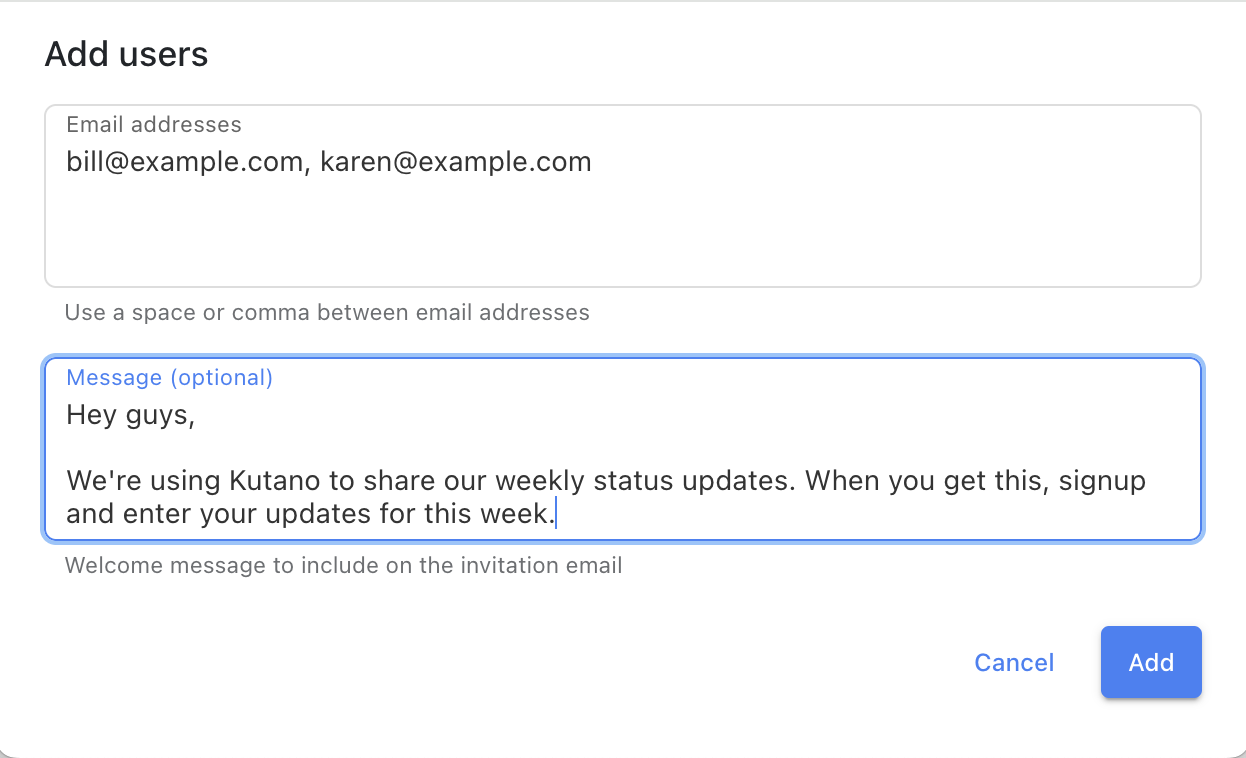
- In the dialog that appears, enter the email addresses of the people you want to invite
- You can add multiple emails at once by separating them with commas
- Each person will receive an invitation email with instructions to join

- Click the Add button to send the invitations
Tip: New users will need to complete the sign-up process when they receive their invitation.
Viewing Detailed User Information
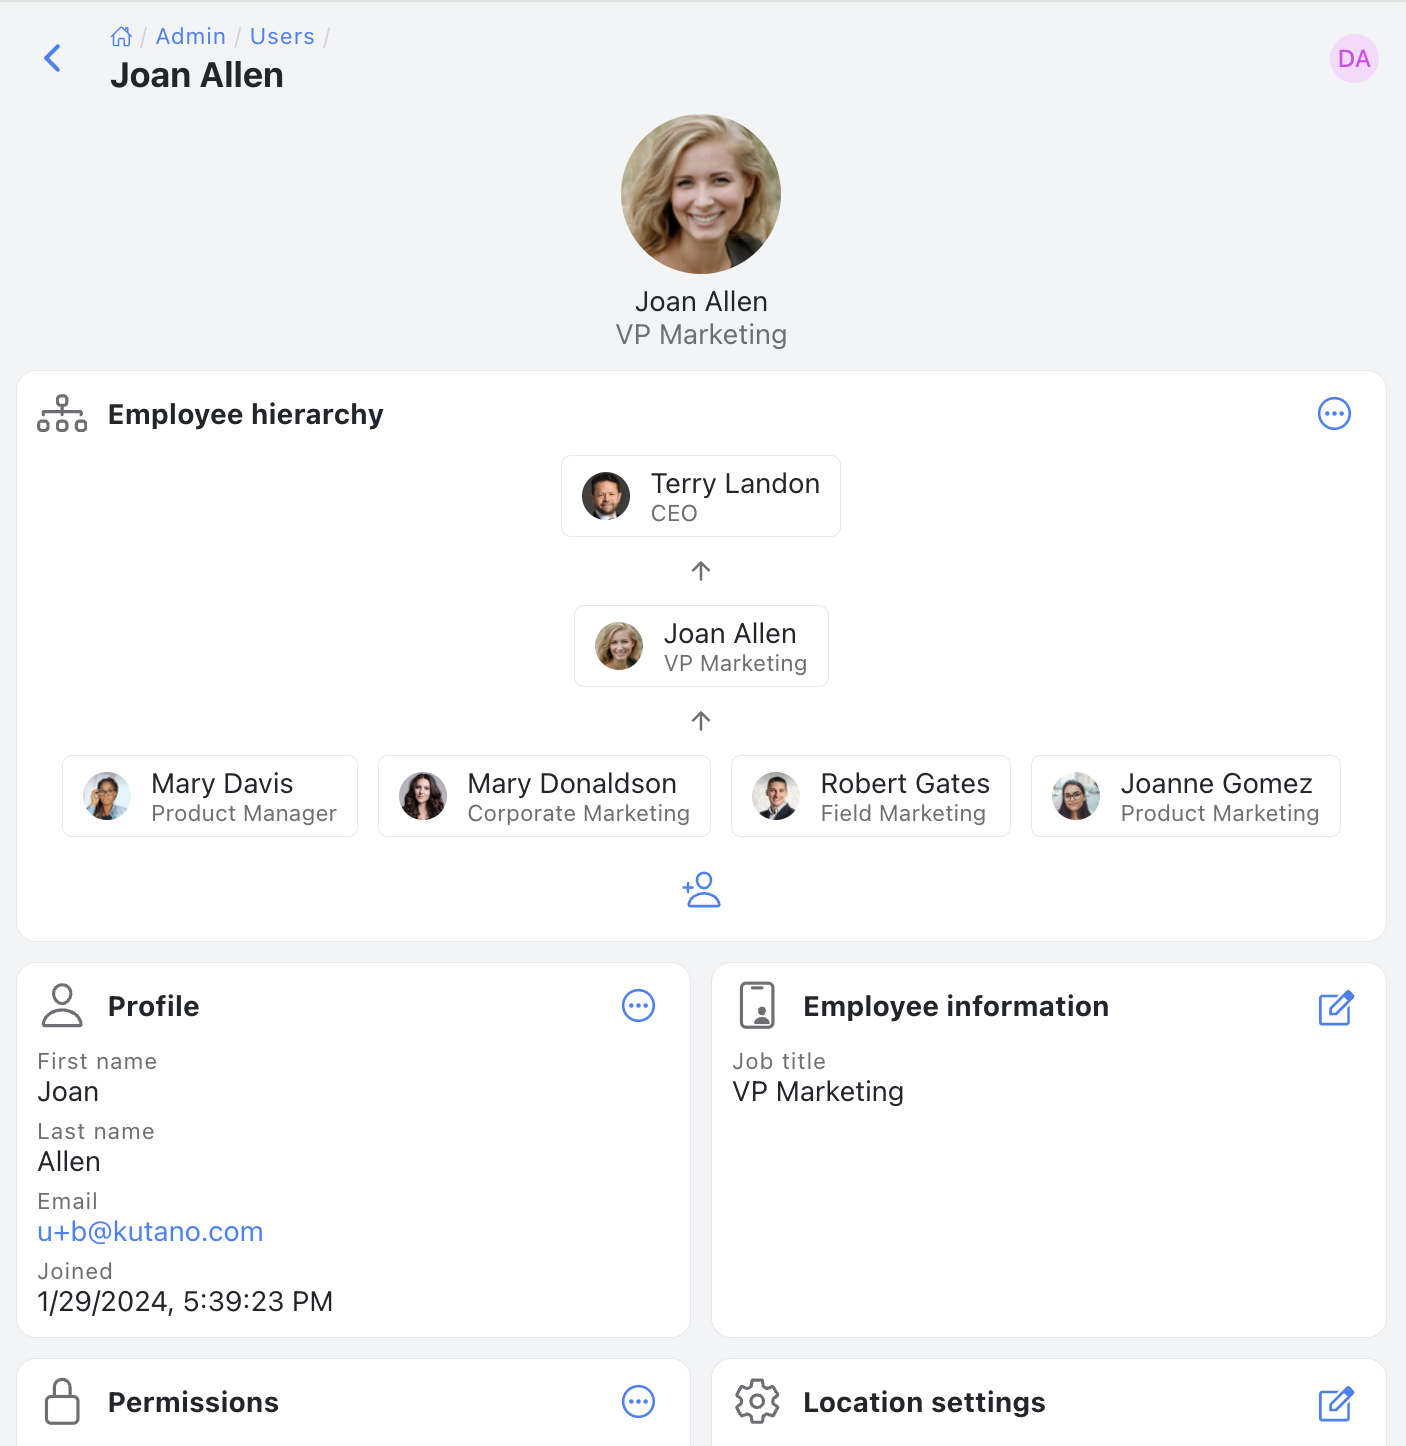
For a complete overview of a user's account:
- Click directly on the user's name in the list
- A detailed profile page will open showing all information about that user

This view lets you see all of their settings, permissions, and account history in one place.