Creating and Managing User Groups
What Are User Groups?
User groups in Kutano are collections of team members that you can manage as a single unit. Instead of adding people to status forms one by one, you can add entire groups at once, making team management much more efficient.
Think of groups like distribution lists in email - you create a group once, add the right people to it, and then use that group wherever you need those same people to have access.
Why Groups Matter for Your Team
Without Groups (Traditional Approach)
- Add individuals to each form manually
- When someone changes roles, update every form they're part of
- Risk missing forms when team members leave
- Difficult to see who has access to what
With Groups (Smarter Approach)
- Add entire teams to forms with one click
- Update group membership once, changes apply everywhere
- Consistent access patterns across all forms
- Clear visibility into team structure and permissions
Who Can Manage Groups?
Workspace Administrators Only - Group management is restricted to workspace administrators to maintain security and consistency.
Not sure if you're an administrator? If you don't see "Workspace Admin" in your sidebar menu, you don't have group management permissions. Contact your workspace owner to request access or to have groups created for you.
Before You Start: Planning Your Groups
Think About Your Team Structure
Good group examples:
- Functional teams: "Engineering", "Marketing", "Sales", "HR"
- Project teams: "Website Redesign", "Product Launch", "Q1 Planning"
- Reporting relationships: "Direct Reports", "Executive Team", "Remote Workers"
- Access levels: "Full Access", "Read Only", "External Contractors"
Step-by-Step: Accessing Group Management
Prerequisites: You must be a workspace administrator to access group management.
Navigate to Groups
- Open the sidebar - Click the menu icon (☰) if using mobile, or look at the left sidebar on desktop
- Find Workspace Admin - Look for this option in the sidebar menu
- Click Groups - Select this from the admin menu options
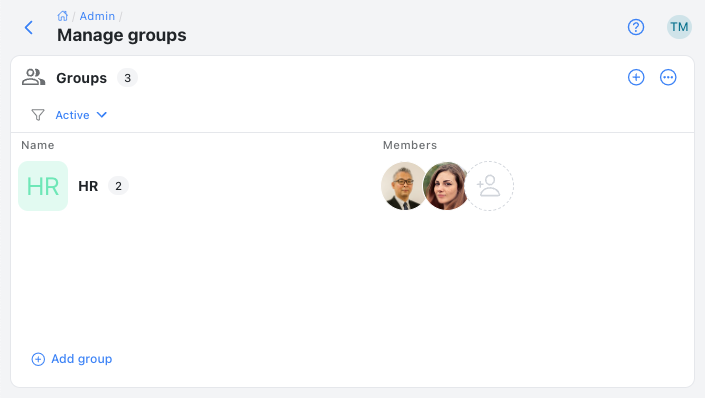
You'll arrive at the group management screen where you can see all existing groups:
Understanding the Groups Interface
What you'll see:
- Group list - All groups in your workspace
- Filter dropdown - Toggle between active and inactive groups
- Add Group button - Create new groups
- Search functionality - Find specific groups quickly
Filter options explained:
- Active groups - Currently usable groups (default view)
- Inactive groups - Deactivated groups that no longer participate in status processes
- All groups - Complete list regardless of status
Creating Your First Group
Step-by-Step Group Creation
-
Click Add Group - Look for the + Add group button at the bottom of the groups list

-
Fill in group details in the dialog box:

-
Save the group - Click the Save button
The new group will immediately appear in your groups list.
Adding Members to a Group
After creating a group, it's empty and needs members. Here's how to populate it:
Adding Individual Users
-
Find your group in the groups list
-
Click the three-dot menu
 next to the group name
 -
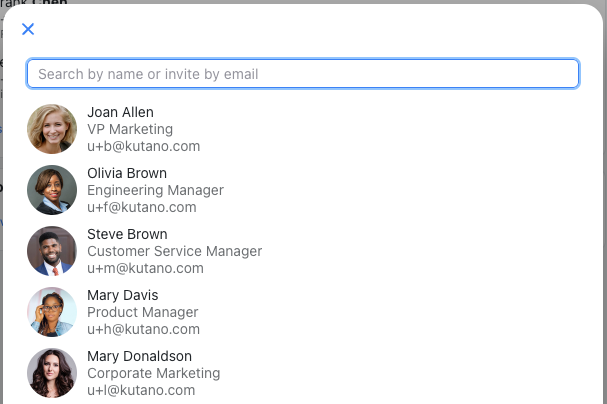
Select "Add users" from the dropdown menu
-
Click on any user's name to add them to the group (they're added instantly)
-
When finished, close the dialog
Group Actions
For each group, there is a three-dot menu icon ![]() that provides a list of actions available for that group.
that provides a list of actions available for that group.
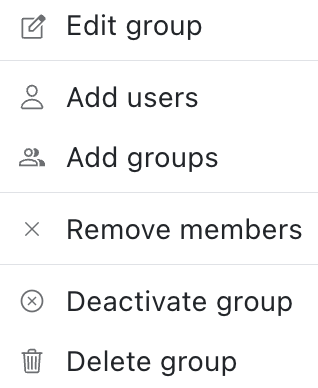
- Edit group - Edit the profile details for the group.
- Add users - Add users to the selected group.
- Add groups - Add groups within the selected group.
- Remove members - Remove one or more members from the selected group.
- Deactivate group - Set the group's status to deactivated so that it no longer participates in the weekly status process.
- Delete group - Remove the selected group from the workspace.
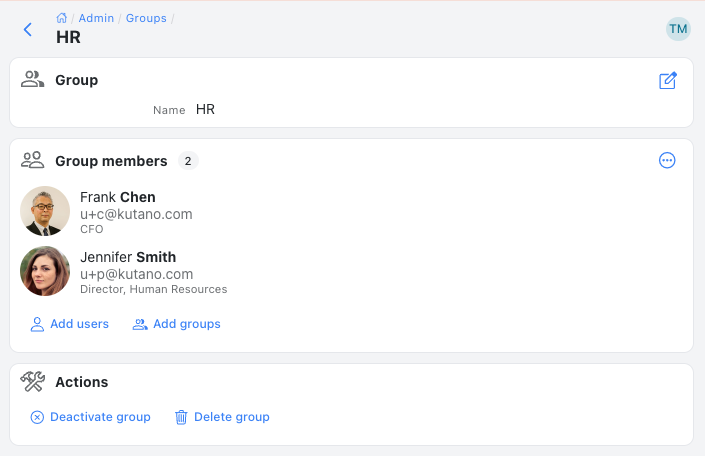
Viewing Group Details
If you want to see additional details about a group, click on the group name to view the full detail page.