Status Form Customization - Sections, Templates & Schedules
Why Customize Your Form?
Most teams start with a template, but may realize they need adjustments to match their specific workflow. Maybe your sales team needs a "Pipeline Updates" section instead of generic "Accomplishments," or your development team wants to track "Sprint Goals" rather than "Weekly Objectives."
Customization lets you:
- Match your team's language - Use terms your team actually uses
- Focus on what matters - Add sections for important metrics, remove irrelevant ones
- Improve adoption - When the form feels natural, people actually use it
- Evolve with your team - Adjust as your processes and priorities change
Before You Start Customizing
Who Can Customize Forms?
- Form Owners - Can modify all aspects of the form
- Form Administrators - Have full customization access
- Contributors and Viewers - Cannot customize forms
If you don't see customization options, contact your form owner or workspace administrator.
Plan Your Changes
Before diving into settings, consider:
- What information does your team really need to share?
- What's working well with the current form?
- What questions do you find yourself asking that aren't captured?
- How much detail do you actually need in each section?
Impact on Existing Data
- Section changes don't delete historical data - Past updates remain intact
- New/updated sections only apply to current and future status periods
- Schedule changes affect future updates, not past ones
Getting to the Form Settings Page
To customize a status form, you'll need administrator privileges for that form.
From your status form's home page click the Settings button in the top navigation bar.
Form Settings Page
You've got four tabs to work with, each handling different aspects of your form:
- Form - This is where you build and preview your status input form
- Schedule - Set up when updates are due and when reminders go out
- Members - Manage who's part of your form and what they can do
- About - Basic form info like name and timezone settings
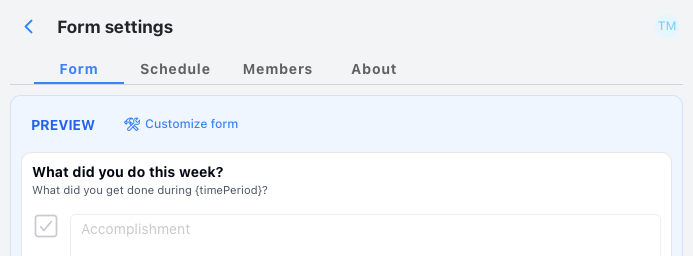
Form Tab
The Form tab is where you design the actual update form your team will see each week. In our example here, we've got a form with three sections: What did I get done this week, What will I accomplish next week, and Is anything blocking your progress?.
You'll start with a preview showing exactly how your input form looks to team members.
Understanding Section Types
Before customizing, it helps to understand the different types of sections available:
- Text sections - For open-ended responses (accomplishments, challenges, notes)
- Number sections - For metrics, percentages, or counts
- Goal/Objective sections - For tracking specific targets or milestones
- List sections - For bullet-pointed items or structured lists
- Custom sections - Specialized sections for specific needs
Choose section types based on how you want people to enter and view information.
Customizing the Form
Click on the Customize form button to take you into customize form mode.
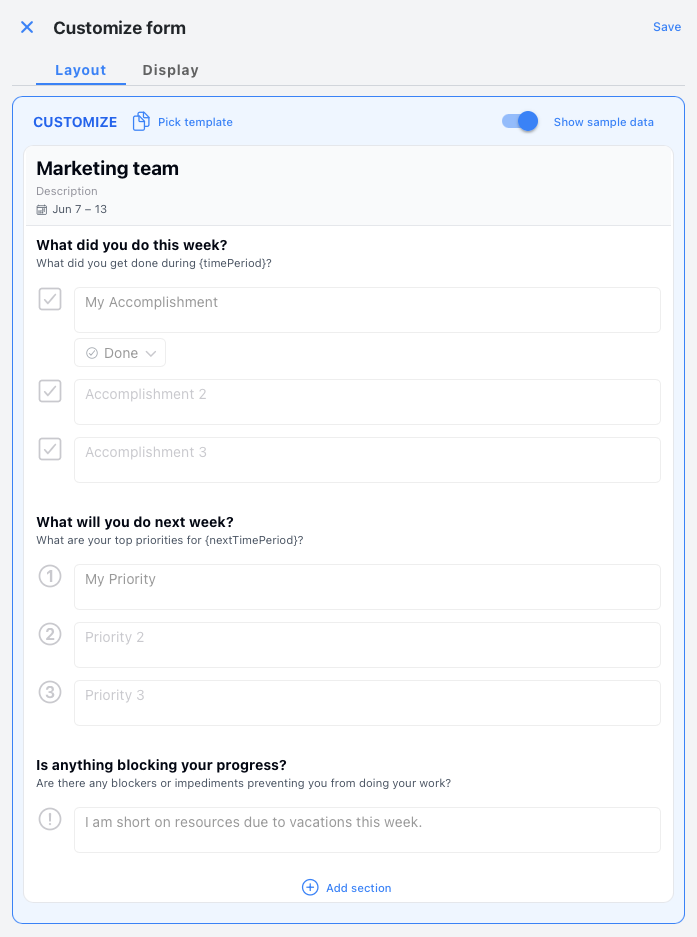
Here are the controls you can use to configure your status input form.
 - Swap out your entire section set with pre-built templates. Found something close but not perfect? No worries – you can still add, remove, or tweak individual sections afterward.
When you hover over a section, you'll see these handy buttons:
 - Drag sections up and down to get the flow just right.
 Drop in new sections whenever you need to capture different types of info.
 Fine-tune individual sections. Got a number section? Pick whether it shows currency, percentages, or plain numbers.
 - Your command center for section-specific actions.
Change Template
Templates can save you tons of setup time. Here's how to swap them out:
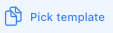
- Click on the button. This will bring up the template picker.
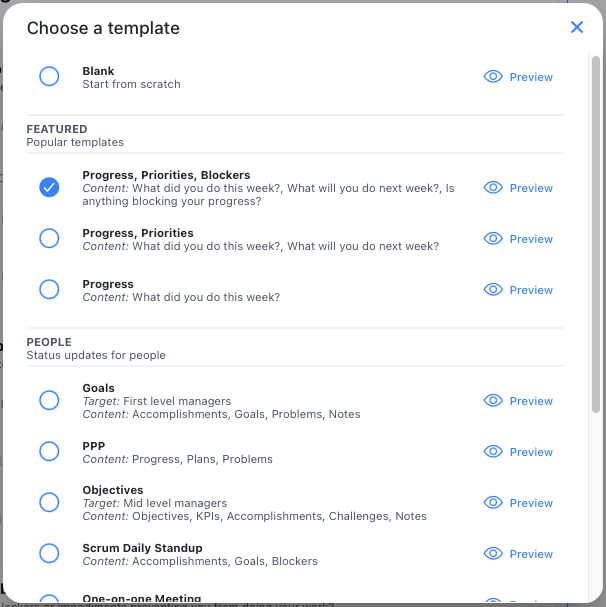
Browse through the available options. Each template has a Preview button so you can peek at what sections you'll get. - Click the circle next to your chosen template.
Your team now has a fresh set of prompts for their weekly updates. Pretty painless, right?
Add Section
Need to capture something specific? Time to add a custom section.
- Click on the or the
 button. This will bring up the Add section selection dialog which allows you to choose from a list of individual sections to add to your status form.
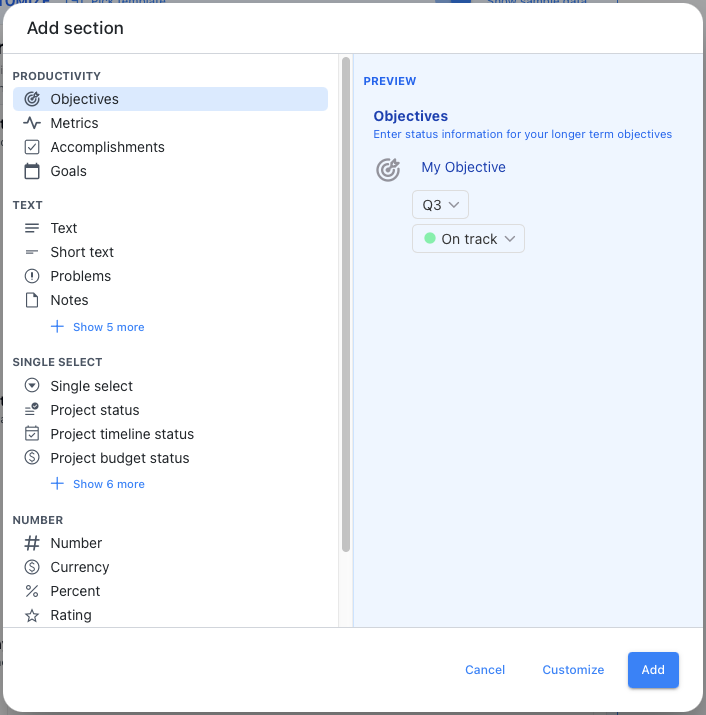
- Let's say you pick Project timeline status – just click it and hit Add. Your new section appears at the bottom of the form, ready to go.
Edit Section
Every section can be customized to match exactly what you need.
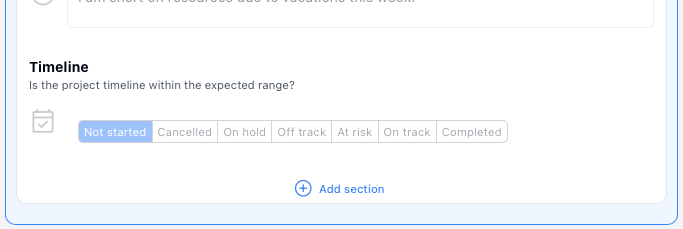
- Find the Project timeline status section, select it by clicking anywhere in the section, then click on the button.
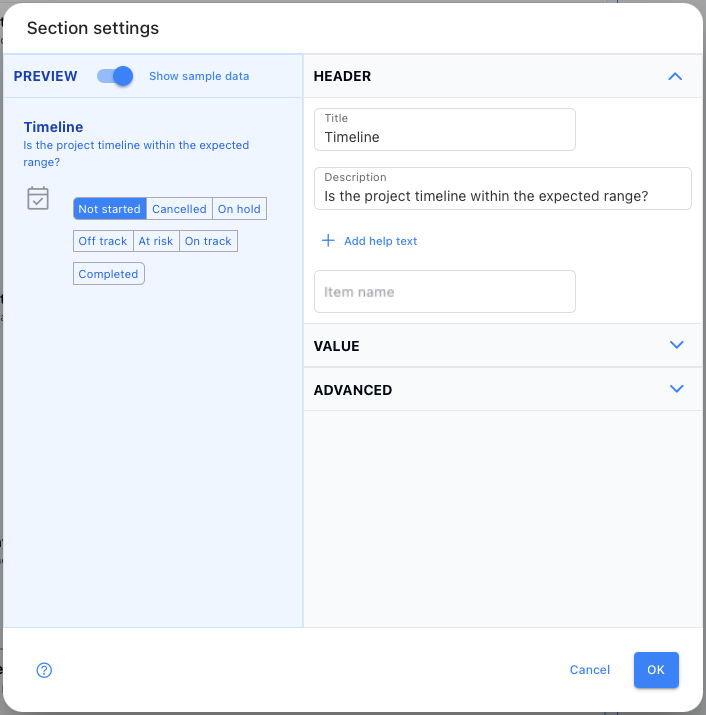
- In the Description field, enter "Enter the status of your project" and click Save.
The description should now appear on the sections list
Move Sections
The order of sections matters more than you might think. Put the most important stuff first.
- Find the Project Status section, select it by clicking anywhere in the section, then click and drag on the reorder button moving it up or down until you have moved it to the desired location within the status form.
Your form flows exactly how you want it now.
Delete Section
Sometimes less is more. Getting rid of unnecessary sections is simple.
- Find the Project timeline status section and click on the button then select the Delete section command. The section will be immediately deleted.
Schedule Tab
Timing is everything when it comes to status updates. Kutano lets you control when updates are due, when reminders go out, and when summaries get sent.
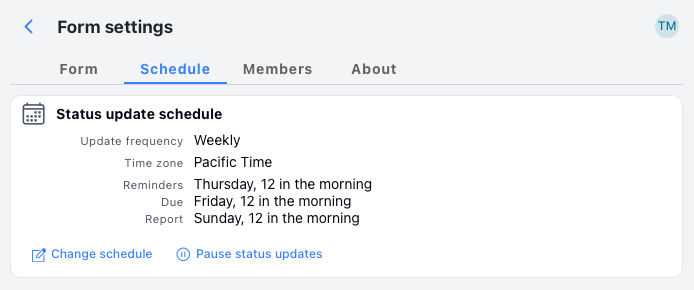
You'll see your current schedule settings laid out clearly.
Setting the Schedule
Click Change schedule to access these options:
- Update frequency - How often do you want updates? Weekly is the sweet spot for most teams, but you've got options:
- Daily (M - F) - Every work day (Monday through Friday)
- Weekly - Once a week on your chosen day
- Every other odd week - Every other week on a specific day of the week. The odd weeks are determined by the ISO Week calendar (See current week number)
- Every other even week - Same as above but for even numbered weeks.
- Monthly - Once a month on a specific day of a specific week within each month.
- Day of week - Pick your update day. Monday for fresh starts? Friday for week wrap-ups? Your call.
- Time - When are updates actually due? Defaults to midnight, but maybe 5PM makes more sense for your team.
- Reminder timing - When should people get nudged? Default is Friday morning at 6 AM, but you can set reminders up to 24 hours before the due date. Nobody likes last-minute panic.
- Summary timing - When do you want the summary email to hit everyone's inbox? Monday at 1 AM is the default, but you can schedule it up to 3 days after the due date.
Members Tab
This is where you control who has access to your status form and what they can do with it.
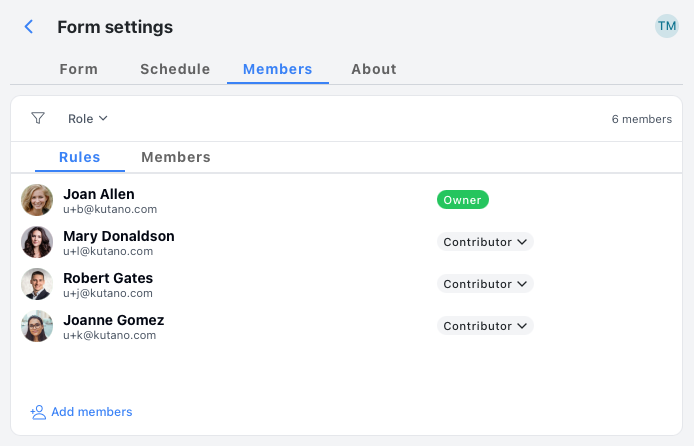
Click the Add members button to bring people in with different permission levels:
- Contributors - These folks submit regular status updates. They're your core team members.
- Commenters - They can read updates and leave comments but don't submit their own updates. Perfect for stakeholders who want to stay in the loop.
- Viewers - Read-only access. They see everything but can't contribute or comment. Great for executives who just want visibility.
About Tab
This tab displays general information about the form.
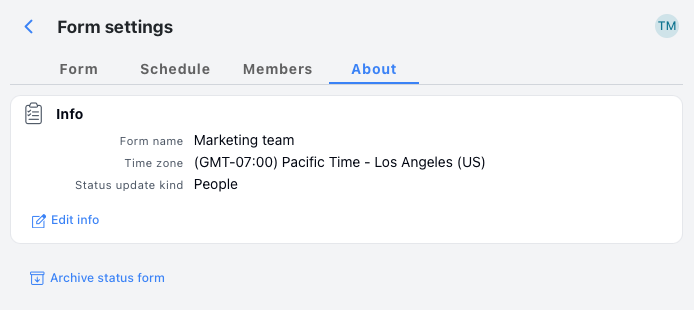
By clicking on the Edit info button, you can change the form's name, timezone, and update kind.
If you're a form admin, you'll also see the Archive status form button. This puts your form in hibernation – it stops working but doesn't get deleted. Once archived, you get two new options:
- Restore status form - Brings it back to life
- Delete permanently - Nuclear option that wipes everything. No take-backs on this one.
Common Customization Scenarios
Scenario 1: Marketing Team Needs Campaign Tracking
Problem: Generic template doesn't capture campaign-specific metrics
Solution:
- Add "Campaign Status" (project status section)
- Add "Campaign Performance" (metrics section for specific KPIs)
- Add "Campaign Updates" (text section for status notes)
- Rename "Accomplishments" to "Launches & Milestones"
- Set weekly schedule with Friday submissions
Scenario 2: Development Team Using Agile
Problem: Template focuses on individual work, not sprint progress
Solution:
- Add "Sprint Goals" (goal section)
- Add "Code Reviews Completed" (number section)
- Rename "Blockers" to "Technical Challenges"
- Set schedule to match sprint cycle (every other week)
Scenario 3: Sales Team Tracking Pipeline
Problem: Need to track deals and revenue, not just activities
Solution:
- Add "Deals Closed" (number section with currency)
- Add "Pipeline Value" (number section with currency)
- Add "Client Meetings" (number section)
- Keep standard "Accomplishments" for relationship building
Scenario 4: Executive Team Monthly Reviews
Problem: Weekly updates too frequent, need strategic focus
Solution:
- Switch to monthly schedule
- Add "Strategic Initiatives" (goal section)
- Add "Key Metrics" (metrics section)
- Remove detailed task-level sections
Best Practices for Form Design
Keep It Simple
- Start with 3-4 sections maximum - You can always add more later
- Use clear, specific section names - "Revenue Updates" is better than "Numbers"
- Avoid duplicate information - Don't ask for the same thing in multiple ways
Match Your Team's Communication Style
- Use your team's actual language - If they say "wins" instead of "accomplishments," use "wins"
- Consider formality level - Startup teams might prefer casual language, enterprise teams more formal
- Think about your industry - Technical teams need different sections than sales teams
Design for Busy People
- Most important sections first - Put what you care about most at the top
- Provide helpful descriptions - Clarify what you want in each section
- Don't make everything required - Allow flexibility for different types of weeks
Plan for Growth
- Start simple, evolve gradually - Add complexity as the team gets comfortable
- Review regularly - Ask your team what's working and what isn't
- Be willing to remove sections - If nobody uses it, get rid of it
Testing Your Customizations
Before Rolling Out Changes
- Preview the form - Click through as if you're a team member
- Submit a test update - Fill out the form yourself to spot issues
- Check mobile view - Many people update on phones
- Time the process - Should take 5-10 minutes max
After Making Changes
- Communicate changes to your team - Explain what changed and why
- Monitor adoption - Are people using the new sections?
- Ask for feedback - Give it 2-3 weeks, then check with your team
- Iterate based on usage - Remove unused sections, clarify confusing ones
Troubleshooting Common Issues
"The form is taking too long to fill out"
- Count your sections - More than 6-7 sections feels overwhelming
- Review section descriptions - Long explanations slow people down
- Check for redundancy - Are you asking for similar information multiple ways?
- Consider your audience - Senior executives need fewer sections than individual contributors
"People are confused about what to write"
- Add section descriptions - Brief explanations help clarify expectations
- Provide examples - Show what good responses look like
- Use specific section names - "Client Updates" is clearer than "External Communication"
- Train your team - Sometimes a quick explanation is all they need
"I can't see customization options"
- Check your permissions - Only form owners/admins can customize
- Make sure you're on the right form - You can only customize forms you administer
- Contact your workspace admin - They may need to adjust your role
Related Resources
Ready to explore other aspects of form management?
- Form Creation - Step-by-step guide to creating your first Status Form
- Form Sharing - Adding team members and managing permissions
- Templates Overview - Understanding and choosing the right template
- Form About - Complete guide to how Status Forms work